A Virtual Private Network (VPN) is a powerful tool that allows you to secure your internet connection and protect your online activities from prying eyes. By routing your internet traffic through an encrypted tunnel, a VPN can safeguard your sensitive information, such as passwords, financial data, and browsing history, from potential cyber threats. So, if you are willing to know the process of how to disable VPN on windows 10 then must read this guide till the end to understand the whole process.
Reasons for Disabling VPN on Windows 10
While VPNs offer numerous benefits, there may be instances where you might want to disable your VPN connection on your Windows 10 device. Some common reasons include:
1. Performance Issues: Depending on the VPN server location and internet connection speed, using a VPN can sometimes result in slower internet speeds, which can be problematic for activities that needs a fast and stable internet connection like online gaming or the streaming.
2. Compatibility Problems: Certain applications or services may not function properly when a VPN is enabled, as they may require a direct internet connection or specific network configurations.
3. Accessing Local Resources: If you need to access local network resources, such as shared files or printers, disabling the VPN may be necessary to ensure seamless connectivity.
4. Personal Preference: Some users may prefer to have direct internet access without the added layer of a VPN, especially in situations where privacy and security concerns are not as critical.
Step-by-Step Guide: Disabling VPN through Settings
Disabling your VPN connection on Windows 10 can be easily done through the Settings app. Follow these steps:
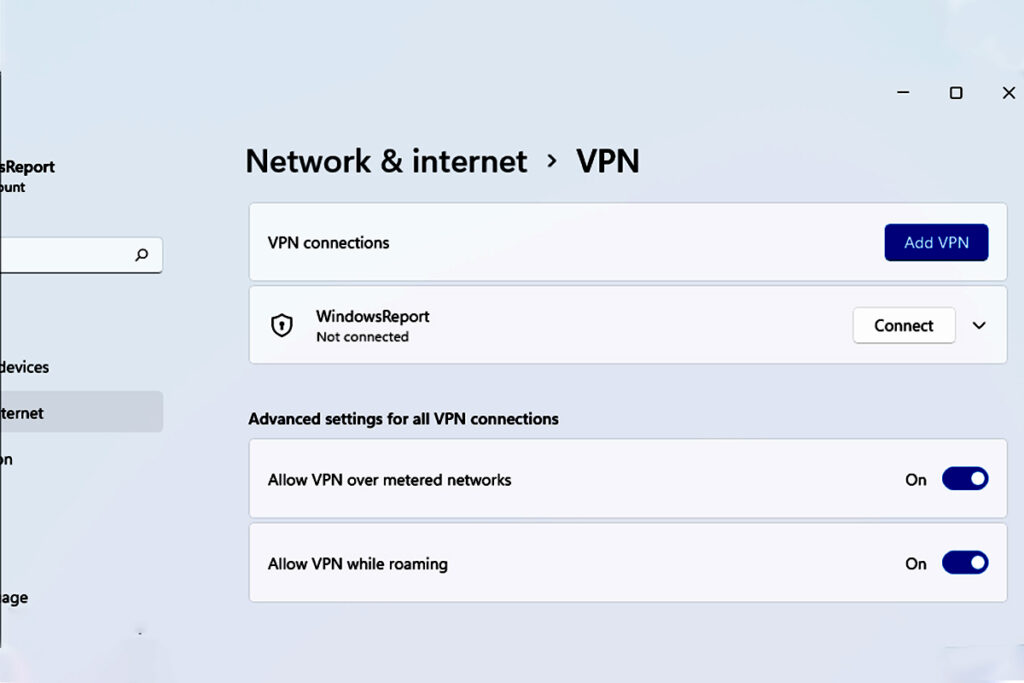
1. Access the Network & Internet Settings: Open the Start menu, search for “Settings,” and click on the Settings app.
2. Navigate to the VPN Section: In the Settings app, click on “Network & Internet,” then select “VPN” from the left-hand menu.
3. Disconnect or Remove the VPN Connection: In the VPN section, you will see your active VPN connection(s). To disconnect, simply click on the “Disconnect” button next to the VPN you want to disable. If you want to permanently remove the VPN connection, click the “Remove” button.

Step-by-Step Guide: Disabling VPN through Taskbar Icon
Another quick way to disable your VPN on Windows 10 is through the taskbar icon:
1. Locate the VPN Icon in the Taskbar: Look for the VPN icon in the taskbar, usually located in the system tray area.
2. Right-click the VPN Icon: Right-click on the VPN icon to reveal the available options.
3. Choose the Disconnect Option: Select the “Disconnect” option from the menu to disable the VPN connection.
Step-by-Step Guide: Disabling VPN through Network Connections
You can also disable your VPN connection through the Network Connections window in the Control Panel:
1. Access Network Connections in Control Panel: Open the Start menu, search for “Control Panel,” and click on it. Then, navigate to “Network and Sharing Center” and click on “Change adapter settings.”
2. Find the VPN Connection in the List: In the Network Connections window, you will see a list of all your network adapters, including your VPN connection.
3. Disable or Remove the VPN Connection: To disable the VPN connection, right-click on it and select “Disable.” If you want to permanently remove the VPN connection, right-click on it and select “Delete.”
Troubleshooting: Common Issues and Solutions
1. VPN Reconnects Automatically: If your VPN keeps reconnecting automatically, you might need to check your VPN client settings or network adapter properties to prevent the automatic reconnection.
2. VPN Connection Fails: If you are unable to connect to your VPN, ensure that you have the correct login credentials and that the VPN server is accessible. You can also try troubleshooting the network connection or contacting your VPN provider for assistance.
3. Slow Internet Speeds: If you experience slower internet speeds with the VPN enabled, try connecting to a different VPN server or adjust the VPN protocol settings to optimize performance.
Conclusion: Ensuring Privacy and Security on Windows 10
Disabling your VPN on Windows 10 can be a simple task, but it’s important to understand the implications. While a VPN can provide an additional layer of security and privacy, there may be instances where you need to turn it off to ensure optimal performance, compatibility, or access to local resources.
By following the step-by-step guides provided in this article, you can easily disable your VPN connection through the Settings app, taskbar icon, or Network Connections window. Remember to consider your specific needs and the potential trade-offs before making the decision to disable your VPN.
Ultimately, managing your VPN usage on Windows 10 is a matter of finding the right balance between security, performance, and accessibility to meet your personal or professional requirements.
Also Read more: Windows 10 Dropping Wi-Fi
FAQs
1. Why would I want to disable my VPN on Windows 10?
You may want to disable your VPN due to performance issues, compatibility problems, the need to access local resources, or personal preference.
2. Can I permanently remove a VPN connection from my Windows 10 device?
Yes, you can permanently remove a VPN connection by going to the Network Connections window, right-clicking on the VPN connection, and selecting “Delete.”
3. Will disabling my VPN compromise my online security and privacy?
Disabling your VPN will remove the additional layer of security and privacy that the VPN provides. However, if you’re in a trusted network environment or don’t have concerns about online threats, disabling the VPN may be appropriate.
4. Can I easily re-enable my VPN connection after disabling it?
Yes, you can easily re-enable your VPN connection by following the same steps you used to disable it, either through the Settings app, taskbar icon, or Network Connections window.
5. Will disabling my VPN affect my ability to access geo-restricted content?
Yes, if you were using the VPN to access content that is geographically restricted, disabling the VPN will likely prevent you from accessing that content.


